7 min read
Planting a Pot of Spring Tulips
Set bulbs in a draining container in autumn, give them a suitable cold period, and bring the pot into view as the buds develop.
On this page
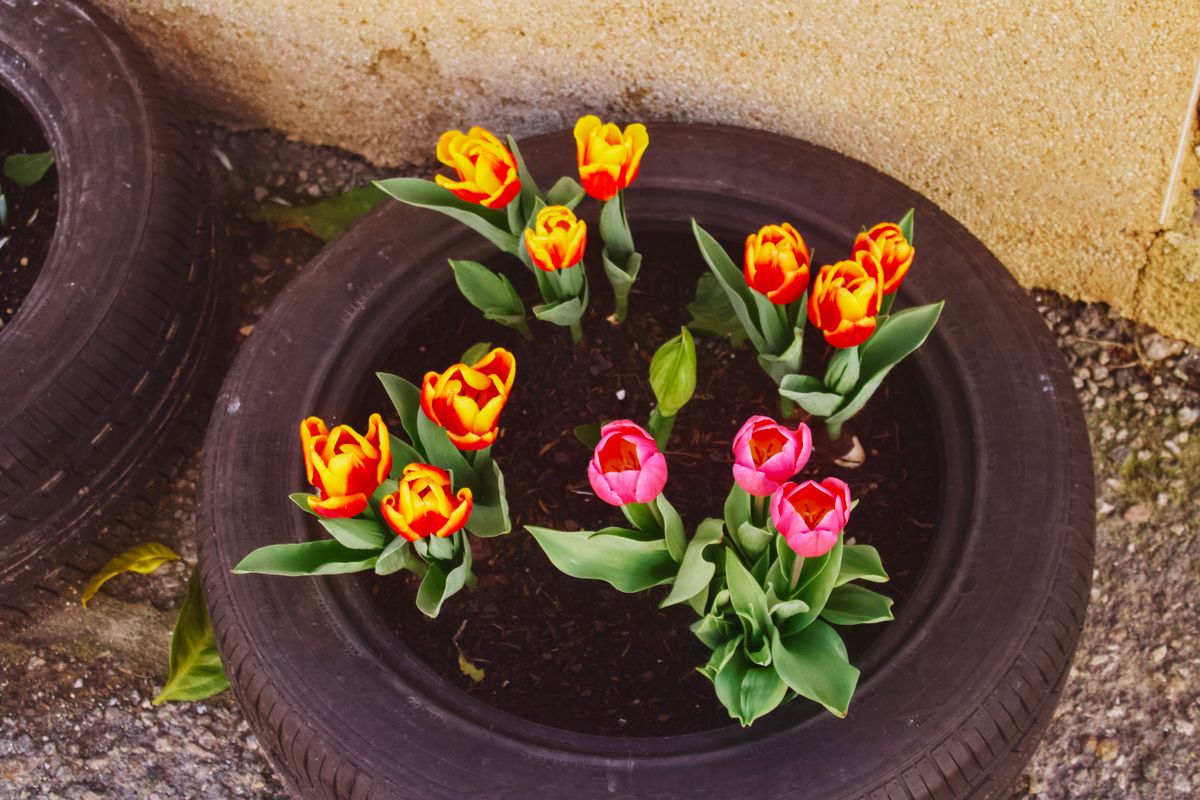
A pot of tulips spends much of its life looking empty. The bulbs need time in cool conditions before spring growth, and a container can wait out that period somewhere less prominent. The work begins when you choose how tall the flowers should be and how long you want the show to last. It ends when you decide what to do with the leaves after the petals have fallen. In between, the most useful jobs are keeping water moving out of the container and protecting the bulbs from conditions that are harsher in a pot than in the ground.
Choose a group that will flower together
Check the cultivar's expected height and bloom period. Early tulips often open before the taller midseason and late varieties, but the timing varies with local weather. If you want one pot to give a strong simultaneous display, use bulbs from a single cultivar or several with similar heights and flowering periods. If you prefer a longer succession, plant two or three smaller containers and rotate them into the best spot as the buds color. Short tulips are a practical choice for exposed steps and balconies, where longer stems can bend in strong wind.
Look for plump, firm bulbs. A dry outer skin may crack or come partly loose without harming the bulb. Soft spots, wet decay and a sour smell warrant setting that bulb aside. Keep unopened bags somewhere cool, dry and airy until planting. If you bought bulbs from several bags, save the labels or write the names on new ones. An early white tulip and a late white tulip may look identical as bulbs but require different expectations when you set them together.
In a region where autumn and winter stay warm, look for locally appropriate bulbs and ask the supplier about prechilling. Tulips generally need a sustained cold period to develop and flower properly. Winter temperatures and suitable chilling schedules differ by cultivar. Prechilled bulbs can be useful where a pot cannot receive enough natural cold. Keep unplanted bulbs away from ripening fruit if you are using a refrigerator for chilling. Ethylene from fruit can damage the developing flower. Follow the supplier's timing for planting once chilled.
Pick a container you can move safely
Use a pot with open drainage holes and depth for both the bulbs and the roots beneath them. A pot that is roughly a foot deep gives many ordinary tulips enough space, but check the recommended planting depth for the bulbs you chose. A broad base helps a container stay upright while the flowers are tall. Pick a frost resistant pot if it will stand outside through freezing weather. Saturated porous pots and very thin glazed pots may crack as temperatures swing. Set the planter on low feet or a surface that lets the holes empty.
Fill with a quality container mix that drains freely. Dampen it before planting if it is very dry. Check the texture by squeezing a handful, then loosening it. A mass that remains dense and sticky may need coarse material suitable for container mixes. A layer of gravel below fine mix uses up rooting room and does little to improve how the mix drains. Check that water can leave through the base and that the saucer, if you use one, can be emptied easily.
Set a few inches of mix in the bottom and lay out the bulbs before covering them. Put the pointed ends upward and keep the bulbs from touching each other or the walls. You can space them closer in a pot for a display than in a garden bed meant to hold them for years. Leave enough mix between them to surround the bulbs completely. A three bulb group may look small at first, but the leaves often fill the spaces before the buds open. Stand the pot on its intended step and check its size from a distance before deciding whether to add more containers.
Plant at a depth that leaves room for roots
Use the depth on the label as your starting point. A common garden rule is to set the base a few bulb heights below the surface. Containers for a temporary display are sometimes planted a little closer, with room below the bulbs for roots. Whatever depth you choose, cover the shoulders evenly and leave space at the rim to water. Work mix around the bulbs with your fingers, firm it lightly and water once so it settles. Add mix over any bulbs that became exposed.
A single layer of tulips is easy to manage. If you want to combine them with smaller bulbs, place the larger tulips lower and put small bulbs in a separate shallower layer, leaving room for shoots to pass. Check that their bloom periods suit the display you want. Small flowers may finish before the tulips rise and share the same pot in succession. Use a label with all the names and their expected order. That is easier to interpret in spring than a mix of shoots you cannot identify.
Place the planted pot somewhere cool for winter. In a mild climate with reliable chill, the natural outdoor cycle can be suitable. In a colder climate, an exposed container can freeze harder than surrounding ground. A sheltered position, an unheated protected space suitable for your conditions, or insulation around the pot can reduce repeated hard freezing. The bulbs still need cold. A heated living room in midwinter can bring on weak shoots long before you intended to display them. Check the location after storms and temperature swings.
Protect the bulbs while the pot looks empty
Water when the mix begins to dry and the weather permits drainage. The dormant pot should stay lightly moist without standing in water. In a wet winter, move it out of direct rain for a time if the soil is saturated. Leave air around the pot and check that the holes are clear. In a sheltered position under a roof, check the moisture periodically. A container protected from rainfall can dry more than the garden around it. This matters before the first leaves appear because roots are already developing out of sight.
If squirrels or other animals investigate fresh soil, lay a piece of secure mesh over the container or raise it slightly above the surface on short supports. Keep the edges from creating a hazard and remove it as the shoots rise so the leaves are free to unfold. A label planted at the edge can mark where bulbs sit if you need to repair disturbed mix. Do not dig through the center of the pot to check for growth. The first shoot may come through unevenly and the rest may follow as temperatures rise.
Look at new shoots after a cold spell. Tulip leaves can handle some cool weather, though open flowers and tall soft shoots can be damaged by hard freezes. Move a portable pot to temporary shelter when severe conditions are forecast. A heavy container can be protected in place if you allow airflow and remove the cover afterward. Move it into a bright outdoor position when growth is well underway. Pick a display spot that you can reach to water as the leaves and buds begin using more moisture.
Give a heavy pot a final move before the stems extend past the rim. A tray with suitable wheels can help on a level patio. If the route includes steps, use smaller pots that you can carry with both hands while holding them level.
Keep the display going through bloom and afterward
Water thoroughly when the upper mix begins to dry and let excess escape. A windy step can dry much faster than a sheltered position near a wall. A warm pot may bring the flowers on quickly and shorten the display. If the buds are showing color and you have a cooler bright position, move the pot there when you want to slow the pace. Rotate a small pot as stems reach toward the light. Leave enough space around the leaves for them to finish expanding.
When the petals fall, remove spent flower heads if you want to keep the bulbs. Leave the leaves and stems while they are green, since they support the next cycle. Move the pot away from the display while the foliage yellows and keep watering when needed. Stop once the foliage dies back and the bulbs become dormant. Many large hybrid tulips flower best their first season, particularly after a close spaced pot display. Some can be planted into a suitable garden bed and may return. Decide whether you have the space and conditions to try before storing a pot of declining leaves in the best spot.
For another container next year, keep a note of which varieties opened in the same week and which remained upright after wind or rain. Record where the pot spent winter and when the first buds rose above the rim. Those dates give you a better basis for arranging several pots than a generic bloom chart. If the first attempt lasted only a short time, use the same successful planting method and add a later variety in its own container.
A tall group that leans together can be steadied with a discreet ring of short canes and soft string. Put the canes close to the inside wall of the pot to reduce the chance of piercing a bulb.
Back to top